Tag Archives: paint

Hidden Message

Standard

Glue – it can be sticky, messy, and uncooperative.  Although glue has some negative aspects, it can be used to create a very unique work of art.

For this art project you will need:

  • Glue (I used Elmer’s School Glue)
  • Canvas
  • Paint
  • Paint brush
  • Pencil

First, gather a quote, word, or saying you like.  You can search on the internet for one, just use one you create yourself, or just use a single word or name.  Use the pencil to write what words you like on the canvas. Then, take the bottle of glue and, carefully and slowly, trace the pencil lines while squirting glue.

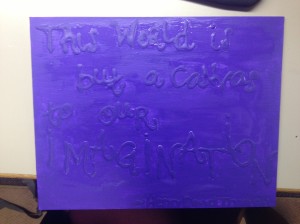
I used the quote by Henry David Thoreau, “This world is but a canvas to our imagination,” and traced the letters twice with glue.

After the glue dries completely, take a single color of paint and paint the entire canvas.  The glue should be sticking up from the canvas creating a “hidden message.”

Canvas with a hidden message using glue. *It looks better in person, it did not photograph well.

Canvas with a hidden message using glue. *It looks better in person, it did not photograph well.

Some tips for this art project:

  • Try using different styles of writing.
  • Use a ruler to create perfect lines or write words with letters a little crooked (like my example).
  • Uses capital and lower case letters.
  • Try using more than one paint color when painting the canvas.
  • If the letters are not standing off of the canvas enough try different glue, or trace the letters with glue again.
Nature Spray

Standard

The inventor of spray paint, Ed Seymour, had no idea that his invention would create works of art.

Brandon Gregory is a young man that created artwork using pieces of nature from his backyard and some spray paint. It is a simple project that is visually appealing and fun to make.  He describes the process of creating this project and some tips.

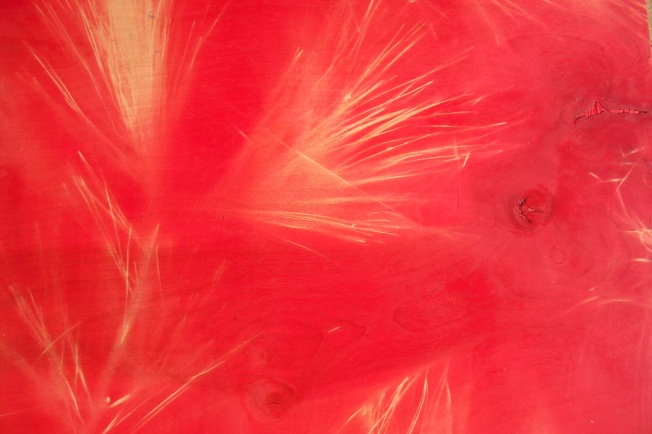
A section of Brandon's artwork using spray paint and pine tree leaves.

A section of Brandon’s artwork using spray paint and pine tree leaves.

For this art project you will need:

  • Anything in nature you would like the silhouette of.
  • A can of spray paint in a color of your preference.
  • A piece of wood, canvas or paper to paint on.  (Brandon used a square section of plywood.)

Some tips when doing this art project:

  • Selecting pieces of nature that are flat will create a more distinctive outline, and the spray paint will not seep underneath your twigs, flowers, etc.
  • Always keep spray paint away from small children.
  • Spray paint in a well-ventilated area.
  • Wear gloves to keep the spray paint from staining your hands.
  • Wear safety glasses to keep spray paint from harming your eyes.
  • Wear old clothes so they will not be stained.
  •  Spray paint outdoors on an area that will not be harmed if stained or with a piece of plastic underneath, such as a trash bag or a paint drop cloth.

Artsy Dates

Standard

“My wife’s jealousy is getting ridiculous.  The other day she looked at my calendar and wanted to know who May was.” – Rodney Dangerfield

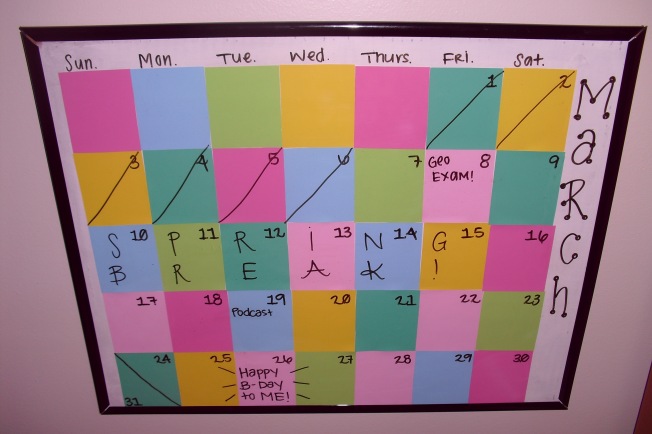
I’ll admit it, I have a little calendar obsession.  I love looking at them and finding the perfect one to hang for the rest of the year.  Sadly, this year I did not find that perfect one.  So I decided to make one.  Everyone needs a calendar, and it is incredibly easy to make your own, artsy one.

For this art project you will need:

  • 35 Paint chips/samples from any store that has a display (they’re free)
  • Glue stick
  • 16×20 poster frame
  • Paint brush
  • Paint
  • Dry erase makers.

The poster frame comes with paper in it.  You do not have to paint if you want a white background, just flip the paper over.  To paint, take off the sides of the frame and the plastic.  Throw the paper away and simply paint on the back cardboard.  It may take a couple of coats.  The paint chips can be cut out while you wait for it to dry.

The paint chips can be any colors you desire.  I picked ones that were large, with one solid color on them.  Cut the samples down to small squares or rectangles, carefully making each one the same size.  I used the image on the back as a guide.

Lay the colors in the order you want them.  If they do not all fit, you may want to cut them more.  Begin to glue the colors on the paper or cardboard.  Make sure they are placed the right way and will not be hanging upside-down if you’re gluing directly to the cardboard. You can leave spaces between or have them all touching.  Leave room to write the days of the week and the month along the edges.

Once it is all glued, put on the plastic and sides of the frame.  Take your dry erase maker (neon ones are available if you chose a dark color scheme) and write the days of the week and the month.

You now have a DIY calendar that is artsy and decorative!

A calendar using paint samples and a poster frame.

A calendar using paint samples and a poster frame.

Tape It Up

Standard

Madi Bandy and Jaylyn Huynh are teenagers that attend Smyrna Middle School in Tennessee. They volunteered to demonstrate how easy art can be! At first Jaylyn was a little nervous saying she couldn’t do any art.  Madi is my sister and I can say, she is a better cheerleader than artist.  Madi said she can’t wait to make another piece of artwork like this (our mom was so proud and wanted to keep Madi’s artwork for herself), and Jaylyn was ready to hang hers in her room.  They had a wonderful time and their projects turned out great!

This slideshow requires JavaScript.

Don’t forget to wear old clothing when painting, it can be very messy.

There are different types of tape available for this project.  Madi used blue painter’s tape that is wider and costs about $2 a roll.  Jaylyn used plain masking tape that is thinner and cost about $0.95 a roll.  You can create any type of pattern with your tape.  Madi put hers on randomly and even cut some little square pieces to fill in gaps.  Jaylyn spent more time and created a pattern that was more consistent.  You can alternate with long or short pieces or have them all the same length.

When you peel off the tape you may notice that some paint got under and caused your lines to not be perfectly straight.  You can take the bottom layer colors and refine the lines if you wish.  Madi and Jaylyn thought it was an interesting look, so they decided not to paint theirs anymore.

Now that you know how to “tape it up” try it for yourself!

Producing a Pollock

Standard

“On the floor I am more at ease, I feel nearer, more a part of the painting, since this way I can walk around in it, work from the four sides and be literally in the painting.” – Jackson Pollock.

Jackson Pollock (1912-1956) was in American painter that was a huge part of the Abstract Expressionism movement.  His works seem to be thrown on the canvas using his style of “action painting.” He created works of art by placing his canvas on the floor and dripping paint from above, making it flow the way he desired.

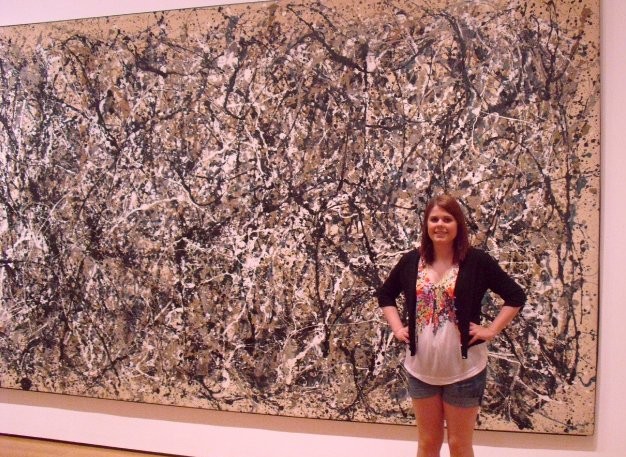
A friend in front of piece of Jackson Pollock's artwork at the Museum of Modern Art in New York City.

A friend in front of piece of Jackson Pollock’s artwork at the Museum of Modern Art in New York City.

To see a collection of Pollock’s works click here.

Creating a piece of artwork like his is very fast and entertaining.  It is abstract, so it does not have to be perfect.  The idea is to get the look of action!

For this art project you will need:

  • A canvas
  • Different color paints of your preference – I like to use acrylic paint.
  • Paintbrushes

Doing this project outside is recommended, unless you want to ‘Pollock’ the whole room!  Remember to wear old clothes, just in case they happen to get paint on them.  If you want your canvas to have a particular background color, you can paint that beforehand and let it dry.

Once you are ready to begin, lay the canvas on the ground.  Use the different color paints to drip onto the canvas.  Try using different techniques, like dipping the paint brush and flicking it, using different size paint brushes, dripping close to the canvas or far away from the canvas.  Work from all sides and move around the canvas to achieve different movements of splatter from the paint.  Once you feel your painting is complete allow it to dry.  It may take a while because the paint might be thick in certain spots of the canvas.  After drying it’s important that you sign your work of art.  Now it is ready to be displayed.

You’ve created your own piece of abstract art inspired by a famous artist!